
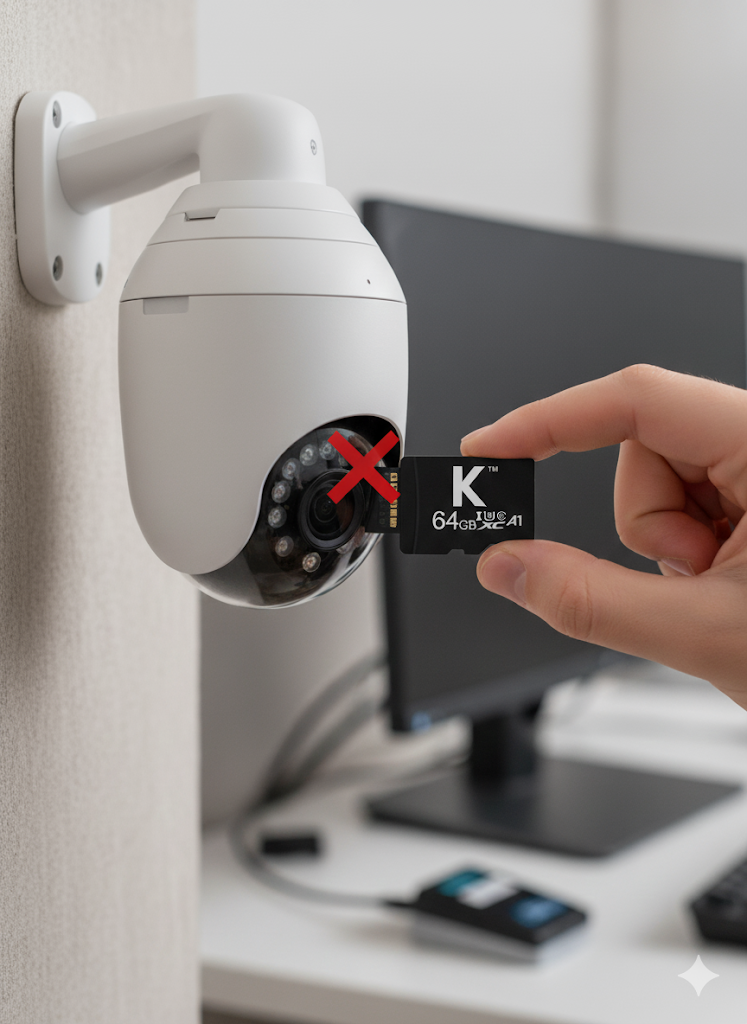
So, your security camera isn't seeing the SD card you just put in? That's a real bummer, especially when you want to record footage. It happens more often than you'd think, and usually, it's something you can fix yourself without needing to call tech support. We'll walk through some common reasons why your security camera doesn't detect the SD card and what you can do about it.
Key Takeaways
- Always check the SD card for physical damage and ensure the lock switch isn't accidentally flipped to 'lock'.
- Try removing and reinserting the SD card, and also power cycling your security camera to refresh its connection.
- Gently clean both the SD card's contacts and the camera's SD card slot if you suspect dirt or debris is causing the issue.
- Formatting the SD card, either in the camera or on a computer, can resolve file system errors that prevent detection.
- Test the SD card in another device, or try a different SD card in your camera, to isolate whether the problem lies with the card or the camera itself.
Troubleshoot SD Card Detection Issues
So, your security camera is acting like the SD card just isn't there? That can be super frustrating, especially when you're trying to record footage. Don't panic just yet. There are a few common culprits behind this issue, and most of them are pretty easy to fix yourself.
Check for Physical Damage to the SD Card
First things first, let's look at the card itself. Sometimes, the simplest explanation is the right one. Take the SD card out and give it a good once-over. Look for any cracks, chips, or bent metal contacts. If you see any obvious damage, the card might be a goner. It's also worth checking if the card has been exposed to moisture or extreme temperatures, as this can sometimes cause internal damage that isn't visible.
Ensure the SD Card Lock is Not Engaged
Did you know SD cards have a tiny little lock switch on the side? It's easy to miss! If this switch is in the 'locked' position, the camera (or any device, really) won't be able to write to it, and sometimes this can even prevent it from being detected at all. Just slide that little switch to the other position and try again. It’s a simple fix, but it trips up a lot of people.
Verify SD Card Compatibility with Your Camera
Not all SD cards are created equal, and your camera has specific requirements. You need to make sure the card you're using is compatible with your particular security camera model. Check your camera's manual or the manufacturer's website for details on supported SD card types (like SD, SDHC, SDXC), maximum capacity (e.g., 32GB, 64GB, 128GB), and speed classes (like Class 10 or U3). Using an incompatible card is a surefire way to have it ignored by your camera.
Here's a quick rundown of common SD card types:
|
Card Type |
Max Capacity |
Notes |
|
SD |
2GB |
Older, less common now |
|
SDHC |
4GB - 32GB |
Most common for basic use |
|
SDXC |
64GB - 2TB |
Higher capacity, faster speeds |
Make sure the card's specifications match what your camera manufacturer recommends. It's better to be safe than sorry when it comes to storage compatibility.
Reinsert and Reboot Your Security Camera
Sometimes, the simplest solutions are the most effective. If your security camera is acting up and not recognizing the SD card, a good old-fashioned reinsert and reboot can work wonders. It’s like giving your camera a quick refresh, clearing out any temporary glitches that might be preventing it from seeing the card.
Properly Remove and Reinsert the SD Card
Before you yank the card out, make sure the camera is completely powered off. Trying to remove it while the camera is on could potentially corrupt data or even damage the card or the camera's slot. Once it's off, locate the SD card slot – it’s usually a small, spring-loaded or push-to-release compartment. Gently push the card in slightly to release it, then pull it straight out. Give the card and the slot a quick visual check for any obvious dust or debris. When you're ready to put it back, align the card correctly with the slot – usually, there's a specific orientation that only allows it to go in one way. Push it in until you feel or hear a click, indicating it's seated properly.
Power Cycle Your Security Camera
This is more than just turning it off and on again. A proper power cycle involves unplugging the camera from its power source entirely. Wait for a good minute or two – this allows any residual power to drain, giving the internal components a chance to reset. After the waiting period, plug the camera back in and let it boot up completely. This process can often resolve temporary software hiccups that might be interfering with SD card detection.
Confirm SD Card is Fully Seated
This might seem obvious, but it's surprisingly common. Even if you think the card is in, it might not be making proper contact with the internal pins. After powering down and removing the card, reinsert it, paying close attention to the feel. You want to be sure it's pushed all the way in and that it feels secure. Sometimes, a slight wiggle or a second push is all it takes to get it properly seated. If it feels loose, it's probably not making contact, and the camera won't see it.
Clean the Camera's SD Card Slot
Sometimes, the issue isn't with the SD card itself, but with the camera's slot. Over time, dust, lint, or other small debris can find their way into the SD card slot, preventing a good connection. It's a pretty common problem, honestly.
Inspect the SD Card Slot for Debris
Before you do anything else, take a good look inside the SD card slot. You might need a flashlight for this. See if you can spot any obvious gunk or foreign objects. If you see anything, it's definitely worth trying to clean it out. A dirty slot is a frequent culprit for detection problems.
Gently Clean the SD Card Slot Contacts
If you see debris, you'll want to clean it carefully. The best tool for this is usually a can of compressed air. Give the slot a few short bursts. If that doesn't do the trick, you can try a cotton swab lightly dampened with isopropyl alcohol. Just make sure it's not soaking wet – you don't want to introduce moisture. Let it dry completely before trying to reinsert the card.
Be gentle. The contacts inside the slot are delicate. You don't want to bend or damage them, as that could lead to bigger problems.
Test the SD Card After Cleaning
After you've cleaned the slot, put the SD card back in and see if the camera recognizes it. Power on the camera and check the settings or storage information. If it works, great! If not, you might need to move on to other troubleshooting steps, but at least you've ruled out a simple dirt issue.
Format the SD Card for Camera Use
Sometimes, even if the card looks fine and is inserted correctly, the camera just won't play nice with it. This often happens because the SD card's file system isn't what your camera expects. Think of it like trying to put a square peg in a round hole – it just doesn't fit right. Formatting the card can fix this by setting it up with the correct file system your camera needs.
Back Up Important Data Before Formatting
Before you go ahead and format anything, you absolutely must back up your data. Formatting wipes everything clean, so if there are any photos or videos on that card that you want to keep, get them off first. You can usually do this by popping the SD card into your computer and copying the files over. If the card is giving you trouble and you can't access the files normally, you might need to use special software to recover them before formatting. It’s a bit of a pain, but losing precious memories is way worse.
Format the SD Card Using the Camera
This is usually the best way to go. Your camera knows exactly what kind of format it likes, so formatting it directly through the camera's menu ensures it's set up perfectly. Here’s generally how you do it:
- Make sure the SD card is inserted into the camera.
- Turn on your security camera.
- Navigate through the camera's settings menu. Look for an option like "Format," "Format SD Card," or something similar.
- Select the format option and confirm when prompted. The camera will then erase everything on the card and set it up correctly.
Format the SD Card on a Computer
If you can't format it in the camera, or if you prefer to do it on your computer, that's an option too. Just be sure you choose the right file system. For most security cameras, this will be FAT32 for cards up to 32GB, or exFAT for larger cards (64GB and up).
Here’s a quick rundown:
- Insert the SD card into your computer's card reader.
- Open File Explorer (on Windows) or Finder (on Mac).
- Find the SD card, right-click on it, and select "Format."
- In the format window, choose the correct file system (FAT32 or exFAT).
- Make sure "Quick Format" is checked. This is usually faster and sufficient.
- Click "Start" or "Format" to begin the process.
Remember, formatting erases all data. Always back up your files first, no matter which method you use. It's better to be safe than sorry when it comes to your recordings.
Address Potential Camera Hardware Problems
Sometimes, even after trying all the software fixes, the problem might be with the camera's hardware itself. It's like trying to plug a USB drive into a port that's just not working right. Let's figure out if that's the case.
Test the SD Card in a Different Device
This is a pretty straightforward test. If your camera isn't seeing the SD card, but you suspect the card itself might be okay, try putting it into something else. A computer with a card reader, another camera, or even a smartphone that accepts SD cards can work. If the card is recognized and functions normally in another device, then the issue is almost certainly with your security camera's SD card slot or internal reader.
Try a Different SD Card in the Camera
On the flip side, if you have a spare SD card that you know works, pop that into your security camera. If the camera detects this new card without any fuss, it strongly suggests that your original SD card has failed or is incompatible. It's always good to have a backup card handy anyway, just in case.
Consider Professional Repair for the Camera Slot
If you've tested your original SD card in multiple devices and it works fine, and you've also tried a known-good SD card in your camera with no luck, then the problem likely lies within the camera's SD card slot. This could be due to physical damage, bent pins inside the slot, or a faulty internal connection. Unfortunately, fixing a damaged SD card slot usually requires some technical skill. You might need to:
- Inspect the slot closely: Use a flashlight to look for any obvious physical damage, like bent pins or debris lodged deep inside.
- Seek professional help: If you're not comfortable opening up electronics, it's best to take your camera to a repair shop. They have the tools and expertise to diagnose and potentially fix hardware issues with the card reader.
Update Camera Firmware and Software
Sometimes, the simplest fix for an SD card not being recognized is to make sure your security camera itself is up-to-date. Think of it like your phone – software updates often fix bugs and improve how different parts of the device work together, including the SD card reader.
Check for Available Camera Firmware Updates
Manufacturers regularly release firmware updates to patch issues and add new features. It's a good idea to see if your camera's manufacturer has released anything new. You can usually find this information on their official website. Look for a "Support" or "Downloads" section and search for your specific camera model. They'll typically list the latest firmware version and any release notes, which might even mention SD card compatibility improvements.
Install Firmware Updates Correctly
Installing firmware isn't usually complicated, but you need to follow the instructions precisely. Most cameras will have a process outlined in their user manual or on the support website. Generally, it involves downloading the firmware file to a computer, transferring it to a USB drive or SD card (if the camera can still read one), and then initiating the update through the camera's menu.
Here's a general rundown of what to expect:
- Download the Firmware: Get the correct file for your exact camera model from the manufacturer's site.
- Prepare Storage: You might need a USB drive or a working SD card to transfer the file.
- Transfer the File: Copy the firmware file to the prepared storage device.
- Initiate Update: Insert the storage device into your camera and navigate to the firmware update option in the camera's settings menu.
- Confirm and Wait: Follow the on-screen prompts to start the update. Do not power off or interrupt the camera during this process.
Restart Camera After Firmware Installation
Once the firmware update is complete, it's standard practice to restart your camera. This allows the new software to load properly and ensures all systems are running as they should. After the restart, check if the camera now recognizes your SD card. If it still doesn't, the firmware update might have fixed other underlying issues, but you may need to revisit other troubleshooting steps.
Wrapping Up: Getting Your Security Camera to See That SD Card
So, your security camera is acting like that one friend who always forgets something important? Don't sweat it. We've gone through a bunch of ways to get your camera to recognize the SD card again, from the simple stuff like reinserting it and giving the camera a quick reboot, to making sure the card itself isn't locked or damaged. Sometimes, it's just a bit of dust in the slot or a formatting issue. If none of the easy fixes work, you might need to look into repairing the slot or even getting a new card. Remember to back up your footage regularly, too, so you don't lose those precious recordings. Hopefully, these steps get your camera recording smoothly again!
Frequently Asked Questions
Why isn't my security camera detecting the SD card?
This can happen for a few reasons. The SD card might be damaged, or it could be inserted incorrectly. Sometimes, the lock switch on the side of the card is accidentally flipped, making it unreadable. Also, the camera might not support the type or size of the SD card you're using.
What should I do if the camera says the SD card is not formatted?
If your camera prompts you to format the SD card, it means the card's file system might be corrupted or not in a format the camera understands. Before formatting, it's a good idea to try and save any important videos from the card onto a computer. Then, you can format the card either through the camera's settings or on a computer.
Can I fix a physically damaged SD card?
Unfortunately, if an SD card is physically broken or has visible damage, it usually can't be repaired. In such cases, you'll need to replace it with a new one. Always handle SD cards carefully to avoid damage.
How do I know if my SD card is compatible with my camera?
Check your camera's user manual or the manufacturer's website. They usually list the types of SD cards (like SD, SDHC, SDXC) and the maximum storage capacity the camera supports. Using an incompatible card is a common reason for detection issues.
What's the best way to clean the SD card slot in my camera?
Turn off your camera first. You can use a can of compressed air to blow out any dust or debris. If there's still grime, gently use a cotton swab lightly dampened with isopropyl alcohol to clean the metal contacts inside the slot. Make sure it's completely dry before putting the SD card back in.
My camera still doesn't see the SD card after trying these steps. What now?
If you've tried all the troubleshooting steps and the camera still won't detect the SD card, the problem might be
