
Connecting a security camera to your phone lets you monitor your property from anywhere, receiving real-time alerts and viewing live footage instantly. Most modern security cameras connect through dedicated mobile apps using Wi-Fi, cellular data, or direct connections, making remote surveillance accessible even for beginners.
Whether you're setting up a wireless camera, dealing with no Wi-Fi situations, or connecting multiple devices, this guide walks you through every method to get your security system running smoothly. You'll learn the exact steps, troubleshoot common issues, and discover which connection type works best for your specific needs.
Ready to take control of your home security? Keep reading to master every connection method and start monitoring your property like a pro.
Why Connect Your Security Camera to Your Phone
Linking your security camera to your phone transforms how you protect your property. Instead of being tied to a monitor or computer, you gain the freedom to check your cameras from anywhere in the world.
Real-time notifications alert you the moment motion is detected, whether you're at work, on vacation, or just upstairs. This instant awareness can make the difference between catching suspicious activity and missing it entirely.
Remote access means you can verify alarm triggers before calling authorities, reducing false alarms and saving time. If something does happen, you'll have immediate access to footage that can help law enforcement respond faster.
Phone connectivity also simplifies camera management. Adjust settings, review recorded clips, and control multiple cameras without touching the physical device. Many apps let you speak through two-way audio, turning your phone into an instant intercom.
For families, this technology offers peace of mind. Check on kids arriving home from school, monitor elderly relatives, or keep an eye on pets throughout the day. The convenience of phone access makes security monitoring practical for daily life, not just emergencies.
Understanding Security Camera Connection Types
Security cameras connect to phones through different technologies, each suited for specific situations. Knowing these options helps you pick the right setup for your property and internet availability.
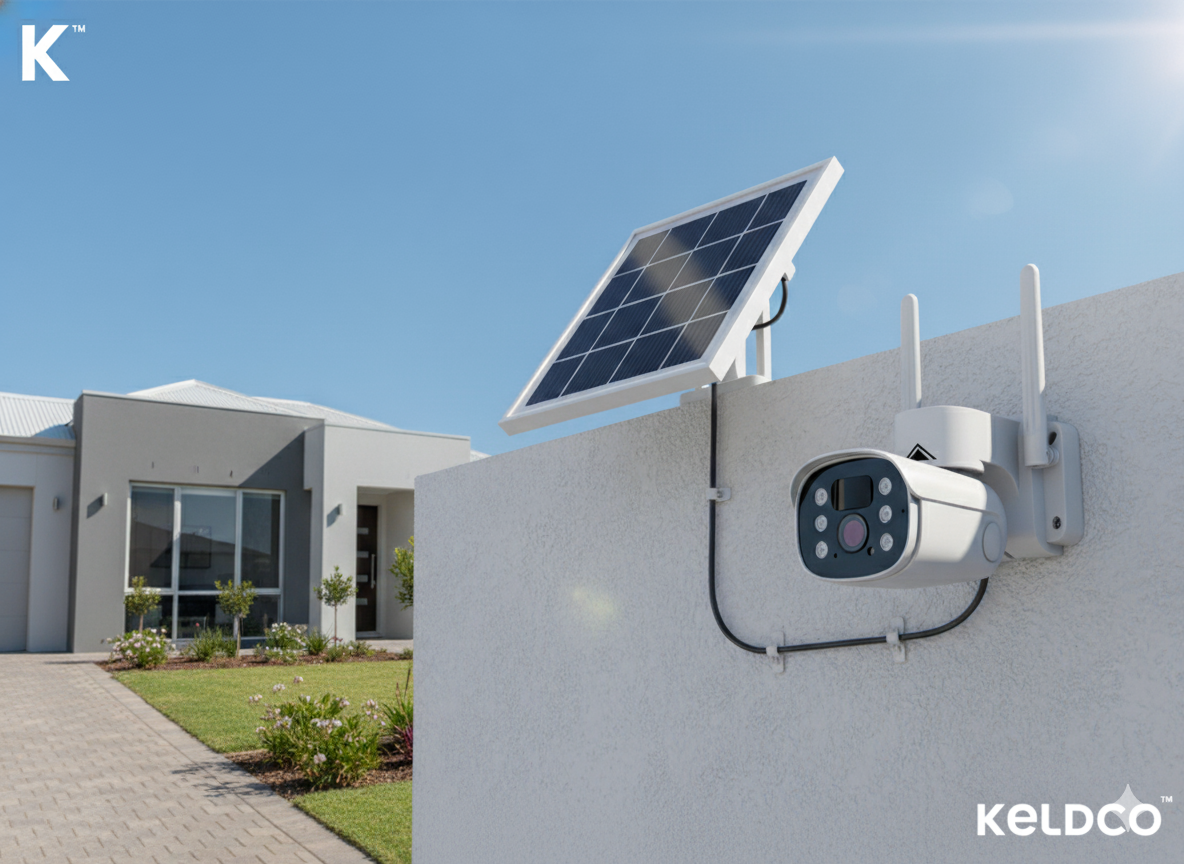
Wi-Fi Connected Cameras
Wi-Fi cameras are the most popular choice for home security because they're simple to install and offer excellent flexibility. These cameras connect to your home's wireless network, then link to your phone through a dedicated app.
The setup process usually takes just minutes. You download the manufacturer's app, create an account, and follow the guided pairing process. The camera connects to your router, and your phone accesses it through the cloud or local network.
Wi-Fi cameras work best when you have reliable internet coverage in the monitoring area. They stream live video, send push notifications, and store footage in the cloud or on local storage. Most models support multiple users, so family members can all access the same cameras.
The main advantage is wireless installation without running cables through walls. You only need power for the camera itself, making placement flexible. However, Wi-Fi cameras depend on your internet connection staying active and strong.
Cellular and LTE Cameras
Cellular security cameras use mobile data networks instead of Wi-Fi, making them perfect for remote locations without internet access. These cameras have built-in SIM cards that connect to cellular towers, just like your smartphone.
You'll need a data plan for the camera, similar to a phone plan. Monthly costs vary based on data usage and video quality settings. Some manufacturers offer bundled plans specifically designed for security cameras.
These cameras excel in areas where running internet cables isn't practical: construction sites, farms, vacation properties, or anywhere beyond Wi-Fi range. They maintain connection even during internet outages, providing uninterrupted monitoring.
Setup involves inserting the SIM card, activating your data plan, and downloading the app. The camera connects through cellular networks, and you access it just like a Wi-Fi camera through your phone.
Explore our business security cameras designed for reliable remote monitoring in any location.
Wired IP Cameras with Network Connection
Wired IP cameras connect through Ethernet cables to your router or network video recorder (NVR). While they require more installation work, they offer the most stable and secure connection available.
These cameras don't rely on wireless signals, eliminating connectivity drops and interference issues. The wired connection provides consistent video quality and faster data transfer, which matters for high-resolution footage.
To access wired cameras on your phone, you'll typically connect through your home network or the NVR's mobile app. The camera connects to your router via cable, and your router provides internet access for remote viewing.
Professional installations often prefer wired systems for businesses or large properties. They're more difficult to jam or hack compared to wireless options, and they don't consume Wi-Fi bandwidth.
The trade-off is installation complexity. Running cables through walls or outdoors requires planning and sometimes professional help. However, once installed, wired systems require minimal maintenance and deliver reliable performance.
Direct Connection Methods (Without Internet)
Some security cameras can connect directly to your phone without any internet or Wi-Fi network. These systems use peer-to-peer connections through technologies like Wi-Fi Direct or Bluetooth.
Direct connection cameras create their own wireless network that your phone joins. This limits range to typically 30-300 feet depending on the technology, but it works anywhere without requiring internet service.
This method is perfect for temporary monitoring, travel, or locations where internet isn't available or desired. You won't get remote access from miles away, but you can view live footage and recordings when within range.
Setup is straightforward: enable the camera's direct connection mode, connect your phone to its network, and open the app. No router configuration or internet account needed.
Looking for flexible monitoring options? Check out our small security cameras perfect for portable setups.
Step-by-Step: How to Connect Security Camera to Phone
Getting your security camera connected to your phone requires following specific steps based on your camera type. These detailed instructions cover the most common connection methods.
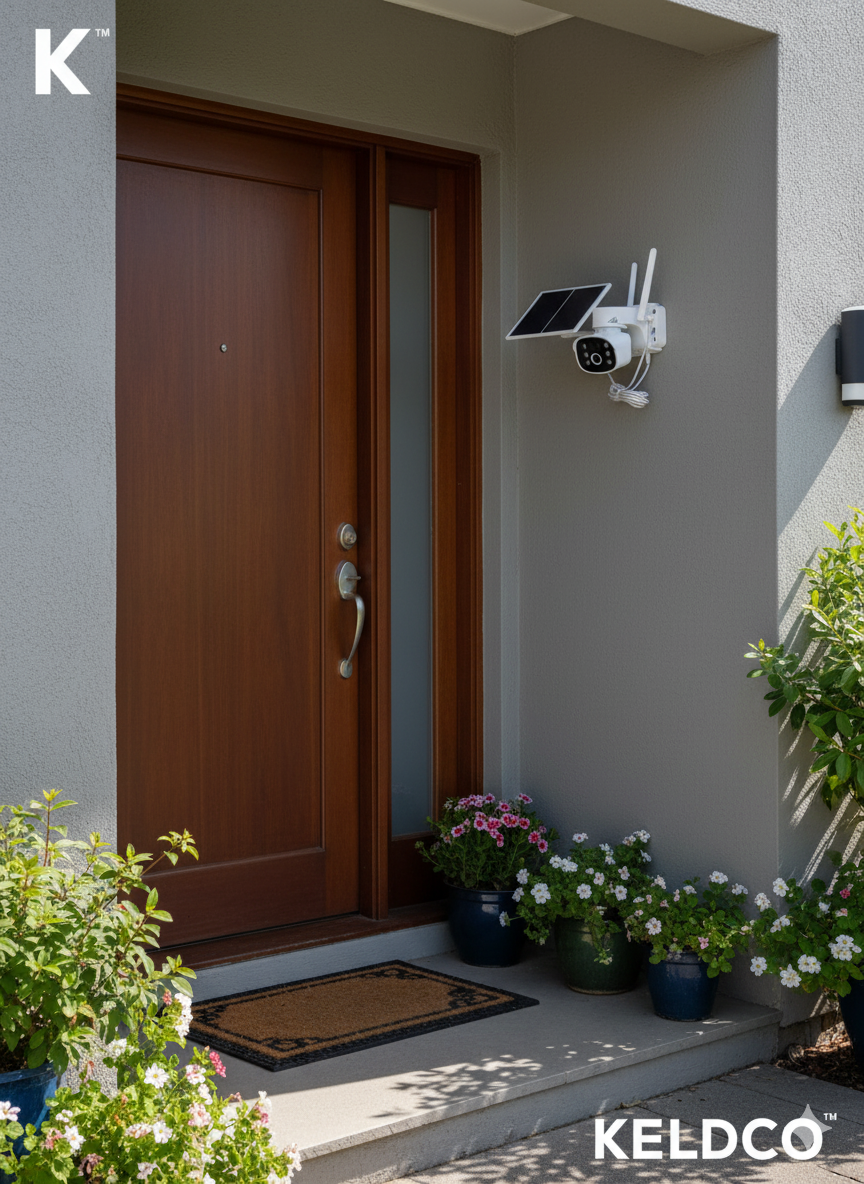
Connecting Wi-Fi Security Cameras
Start by downloading the camera manufacturer's app from the App Store or Google Play. Install the app and create an account using your email address. Most apps will send a verification code to confirm your identity.
Power on your security camera and wait for the indicator light to show it's ready for pairing. This usually means a blinking light, often blue or red. Check your camera's manual for the specific signal.
Open the app and select "Add Device" or "Add Camera." Choose your camera model from the list. The app will prompt you to connect to your home Wi-Fi network, so have your network name and password ready.
Most apps use a QR code system for easy connection. The app generates a QR code on your phone screen. Hold your phone in front of the camera lens so it can scan the code. You'll hear a beep or see a light change when successful.
If the QR code method doesn't work, select manual connection. The camera will create its own temporary Wi-Fi network. Go to your phone's Wi-Fi settings and connect to this network (it usually starts with the camera brand name). Return to the app to complete the setup.
Enter your home Wi-Fi credentials when prompted. The camera will disconnect from its temporary network and join your home network. This process takes 30-60 seconds. Once connected, the app will show a live view from your camera.
Name your camera based on its location (Front Door, Garage, Backyard) to make identification easier when you have multiple devices. Set up notifications, detection zones, and recording preferences in the app settings.
Common Wi-Fi Connection Issues:
- Camera won't enter pairing mode: Press and hold the reset button for 10-15 seconds until lights flash
- QR code won't scan: Increase screen brightness and ensure the camera lens is clean
- Can't find Wi-Fi network: Make sure you're connecting to a 2.4GHz network, not 5GHz (most cameras only support 2.4GHz)
- Connection keeps dropping: Move the camera closer to your router or use a Wi-Fi extender
Connecting Cameras Without Wi-Fi
For cameras with cellular capability, start by inserting the SIM card into the designated slot on the camera. Make sure the SIM card is activated with your mobile carrier before installation.
Power on the camera and wait for it to establish a cellular connection. This may take 2-3 minutes as it searches for the strongest signal. The camera's indicator light will show when it's connected to the cellular network.
Download the manufacturer's app and create your account. Select "Add Device" and choose the cellular camera option. Enter the camera's unique ID number, usually found on a sticker on the device or in the included documentation.
The app will connect to your camera through the cellular network. You'll see a live view once the connection is established. Configure your notification settings and recording preferences just like a Wi-Fi camera.
For direct connection cameras without internet, enable the camera's hotspot or Wi-Fi Direct mode. This is typically done by pressing a specific button combination or through the camera's physical controls.
Go to your phone's Wi-Fi settings and look for a network matching your camera's name. Connect to this network using the password provided in the camera documentation (often printed on the device).
Open the camera app and it should automatically detect the camera on its private network. You won't need to enter account credentials since you're connecting directly without cloud services.
Discover wireless outdoor security cameras that work with various connection methods.
Connecting Multiple Cameras to One Phone
Most security camera apps support multiple devices under a single account. After connecting your first camera, simply repeat the addition process for each new camera.
In the app, navigate to the device list and select "Add Device" or the plus icon. Follow the same connection steps for each camera. The app will organize all your cameras in one interface.
Name each camera clearly and consider organizing them by location or priority. Many apps let you create groups (Indoor, Outdoor, First Floor) for easier navigation when you have many cameras.
You can view multiple camera feeds simultaneously using the app's multi-view or grid display feature. This lets you monitor several areas at once without switching between individual cameras.
Set different notification rules for each camera based on its location and purpose. You might want instant alerts from your front door camera but less frequent notifications from a backyard camera.
Choosing the Right Connection Method for Your Needs
Selecting the best connection type depends on your specific situation, internet availability, and monitoring requirements. Here's how different scenarios match with ideal connection methods:
| Your Situation | Best Connection Type | Why It Works |
|---|---|---|
| Home with reliable Wi-Fi | Wi-Fi cameras | Easy setup, cloud storage, multiple user access |
| Remote property (cabin, farm) | Cellular/LTE cameras | No internet needed, works anywhere with cell signal |
| Temporary monitoring | Direct connection | No setup fees, works immediately, portable |
| High-security needs | Wired IP cameras | Most secure, can't be jammed, stable connection |
| Rental property | Wi-Fi or cellular | Easy to install and remove, no permanent wiring |
| Large property | Mix of wired and cellular | Reliable core system with flexible remote coverage |
Connection Method Comparison
| Feature | Wi-Fi Cameras | Cellular Cameras | Wired IP Cameras | Direct Connection |
|---|---|---|---|---|
| Installation Ease | Very easy, 15-30 minutes | Easy, 20-40 minutes | Moderate to difficult, 1-3 hours | Very easy, 5-10 minutes |
| Remote Access | Yes, from anywhere | Yes, from anywhere | Yes, from anywhere | No, limited to local range |
| Monthly Costs | None (except cloud storage) | Data plan required ($10-30/month) | None | None |
| Reliability | Depends on Wi-Fi strength | Very reliable | Most reliable | Limited by range |
| Setup Requirements | Wi-Fi network, power outlet | Cellular signal, power, data plan | Ethernet cables, router/NVR | Power only |
| Best For | Most home users | Remote locations | Professional setups | Temporary monitoring |
Choose Wi-Fi cameras if you have stable internet and want the easiest setup with full remote access. They're perfect for most homeowners and offer the best balance of features and convenience.
Go for cellular cameras when you need monitoring in areas without Wi-Fi or want backup connectivity during internet outages. They're ideal for construction sites, vacation homes, or rural properties.
Select wired IP cameras for permanent installations where you prioritize reliability and security over easy installation. Businesses and tech-savvy homeowners who want professional-grade systems benefit most.
Use direct connection for short-term monitoring, travel security, or situations where you don't want cloud storage. They work great as baby monitors or temporary job site surveillance.
Browse our CCTV security cameras for professional-grade monitoring solutions.
Optimizing Your Phone-Camera Connection
Once connected, several adjustments can improve performance, save data, and enhance your monitoring experience.
Improving Connection Stability
Wi-Fi cameras perform best when router signal strength is strong. If your camera is far from the router, consider installing a Wi-Fi extender halfway between them. Position the extender where it receives a solid signal from the router.
For cellular cameras, signal strength matters just as much. Check the camera's signal indicator in the app. If it's weak, try repositioning the camera or adding an external antenna if your model supports it.
Reduce interference by keeping cameras away from other wireless devices like baby monitors, cordless phones, or microwave ovens. These can disrupt Wi-Fi signals and cause connection drops.
Update your camera's firmware regularly through the app. Manufacturers release updates that fix bugs, improve stability, and sometimes add new features. Enable automatic updates if available.
Managing Data Usage and Storage
Video streaming uses significant data, especially at higher resolutions. Adjust video quality settings based on your needs. Use high definition for important areas like entrances, but lower quality for less critical zones.
Enable motion-triggered recording instead of continuous recording to save storage space and reduce data consumption. The camera only records when it detects movement, dramatically cutting data usage.
Set recording schedules if you only need monitoring during specific times. Many apps let you create schedules so cameras only record during work hours or overnight.
For cloud storage, choose plans that match your actual needs. Review footage retention periods and number of cameras covered. Local storage on SD cards can eliminate monthly cloud costs for some camera models.
Configure notification sensitivity to avoid constant alerts. Adjust motion detection zones to ignore areas with frequent movement like trees swaying or passing cars. This reduces unnecessary recordings and notifications.
Learn about power solutions in our guide on how much sunlight a solar security camera needs.
Troubleshooting Common Connection Problems
Even with proper setup, you might encounter issues connecting your camera to your phone. These solutions address the most frequent problems.
Camera Won't Connect to Phone
First, verify your camera has power and is turned on. Check that indicator lights are functioning. If there are no lights, test the power adapter with another device or try a different outlet.
Restart both your camera and phone. Power cycle the camera by unplugging it for 30 seconds, then plug it back in. Restart your phone completely to clear any app glitches.
Delete the camera from your app and start the pairing process from scratch. Sometimes partial connections create conflicts that a fresh start resolves.
Make sure your phone and camera are on compatible networks. Most cameras only work with 2.4GHz Wi-Fi, not 5GHz. Check your router settings and connect your phone to the 2.4GHz network during setup.
Disable VPN services on your phone temporarily during setup. VPNs can interfere with the initial connection process. You can re-enable them after the camera is successfully added.
Live View Not Working
If you can't see live video, check your internet connection on both your phone and camera. Test your phone's connection by opening a website. For the camera, verify it shows as online in the app.
Reduce video quality settings if live view is choppy or freezes. High-resolution streams require more bandwidth. Lowering quality often fixes streaming issues, especially on cellular data.
Close other apps running on your phone that might use significant bandwidth. Background downloads or streaming services can interfere with camera feeds.
For cellular cameras, verify your data plan is active and hasn't reached its limit. Contact your carrier if you suspect service issues.
Clear the app's cache in your phone settings. Accumulated cache files can slow performance or cause viewing problems. After clearing cache, log back into the app.
Notifications Not Arriving
Enable notifications in both the camera app and your phone's system settings. Go to Settings > Notifications and ensure the camera app has permission to send alerts.
Check notification settings within the camera app. Make sure motion detection is enabled and sensitivity is set high enough to detect movement.
Disable battery optimization for the camera app. Some phones aggressively manage background apps to save battery, which can block notifications. Look for this setting in your phone's battery or app management section.
For Android users, ensure the app isn't in battery saver mode or restricted background data. For iPhone users, check that Background App Refresh is enabled for the camera app.
Test notifications by triggering motion in front of the camera. If you receive the alert, your settings are correct but sensitivity might need adjustment.
Having SD card issues? Read our guide on security camera doesn't detect SD card for solutions.
Maximizing Security and Privacy
Protecting your camera system from unauthorized access is just as important as monitoring your property. These practices keep your footage private and secure.
Essential Security Practices
Change default passwords immediately after installation. Default passwords are publicly available and make cameras easy targets. Create unique, strong passwords with a mix of letters, numbers, and symbols.
Enable two-factor authentication if your camera app supports it. This adds an extra security layer requiring a code sent to your phone before allowing access to camera feeds.
Keep firmware updated to patch security vulnerabilities. Manufacturers regularly release updates fixing newly discovered security issues. Check for updates monthly or enable automatic updates.
Use a separate network for security cameras if possible. Many modern routers support guest networks or VLANs that isolate IoT devices from your main network, limiting potential damage if a camera is compromised.
Review user access regularly if you've shared camera access with family or employees. Remove access for anyone who no longer needs it. Most apps let you see who has access to your cameras.
Disable features you don't use, particularly remote access if you only view cameras at home. Fewer enabled features mean fewer potential security vulnerabilities.
Explore our security surveillance camera collection with advanced security features.
Privacy Considerations
Position cameras to monitor your property without invading neighbors' privacy. Avoid pointing cameras at areas where people have a reasonable expectation of privacy, like neighboring bedroom windows.
Use privacy zones in your camera app to block out sensitive areas from recording. Many apps let you draw boxes over portions of the view that won't be recorded or visible in live view.
Inform family members and visitors about camera locations. Clear communication prevents uncomfortable situations and respects everyone's privacy rights.
Check local laws regarding audio recording. Some jurisdictions require consent from all parties before recording audio, while others allow recording in your own home without notice.
Regularly review who can access your cameras and limit sharing to essential people only. More users increase the risk of credentials being compromised.
Wrapping Up Your Security Camera Setup
Connecting your security camera to your phone opens up powerful monitoring capabilities that keep your property protected around the clock. Whether you chose Wi-Fi, cellular, wired, or direct connection methods, you now have the knowledge to set up and maintain a reliable surveillance system.
The key to successful camera-phone integration is matching the connection type to your specific needs and environment. Start with the method that fits your current setup, and don't hesitate to combine different connection types as your security needs grow.
Remember that technology works best when maintained properly. Regular updates, smart notification settings, and proper security practices ensure your system stays effective and secure for years to come.
Want to expand your security knowledge? Check out our guide on the best outdoor security cameras without subscription to find budget-friendly monitoring solutions.
Frequently Asked Questions
How to connect security camera to phone without Wi-Fi?
You can connect security cameras to your phone without Wi-Fi using cellular cameras with built-in SIM cards and data plans, or cameras with direct connection capabilities through Wi-Fi Direct or Bluetooth. Cellular cameras work anywhere with mobile network coverage, while direct connection cameras create their own local network your phone joins within range.
How do I get my camera to work on my phone?
Download your camera manufacturer's official app from the App Store or Google Play, create an account, then add your camera through the app's setup wizard. Power on the camera, ensure it's in pairing mode (indicated by blinking lights), and follow the in-app instructions to scan the QR code or manually connect to your network.
How do I connect my wireless security camera?
Connect wireless security cameras by first downloading the app and creating an account, then powering on the camera and waiting for pairing mode. Use the app to scan the camera's QR code or manually connect to the camera's temporary Wi-Fi network, then enter your home Wi-Fi credentials to complete the connection.
How to connect an external camera to a phone?
External cameras typically connect through USB adapters (using USB-OTG cables for Android or Lightning adapters for iPhone) or wirelessly through Wi-Fi or Bluetooth. For security purposes, most external security cameras use dedicated apps rather than your phone's native camera app, requiring app installation and account setup.
Can I connect a security camera to my phone?
Yes, nearly all modern security cameras support phone connectivity through dedicated mobile apps. The camera connects via Wi-Fi, cellular data, or direct connection, allowing you to view live feeds, receive notifications, and access recorded footage from anywhere using your smartphone.
Do security cameras need Wi-Fi to connect to phones?
Security cameras don't necessarily need Wi-Fi to connect to phones. Alternatives include cellular cameras using mobile data networks, cameras with direct Wi-Fi connections that create their own network, or wired cameras accessed through your local network. However, Wi-Fi cameras offer the most convenient setup for most users.