Wondering how to wire outdoor security cameras properly? The short answer is: it’s about choosing the right cable type, power method, and placement to ensure a stable, long-lasting connection. Wiring outdoor security cameras the right way not only improves image quality but also extends system life.
In this detailed guide, we’ll walk through everything—from planning your camera layout to power supply options and wiring without attic access. You’ll learn exactly what tools you need, how to wire safely, and which setup best suits your home or business.
If you’re setting up your first wired system, this breakdown will make the process simple, safe, and efficient.
Why Proper Wiring Matters for Outdoor Security Cameras
Correct wiring doesn’t just make your cameras work—it ensures they work reliably. Bad cable choices or messy connections can lead to poor footage, signal dropouts, or even electrical hazards.
Key Benefits of Proper Wiring:
-
Consistent Power: Stable voltage prevents random shutdowns.
-
Stronger Signal: Proper cabling reduces interference and image lag.
-
Weather Resistance: Shielded cables prevent corrosion and wear.
-
Professional Appearance: Concealed cables keep your exterior neat and protected.
Wiring outdoor security cameras might sound complex, but with the right planning, it’s straightforward and much safer than relying solely on wireless models that depend on signal range. For an overview of camera types and performance, see our related guide:
👉 Wired vs Wireless Security Cameras.
Planning Your Wiring Setup
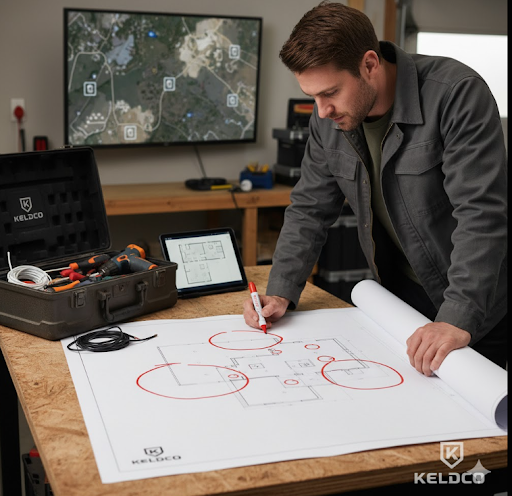
Before you start drilling or pulling cables, plan your layout. This step saves time and prevents costly rework.
1. Map Out Camera Locations
Walk around your property and decide where cameras will go. Ideal areas include:
-
Front and back doors
-
Driveway and garage
-
Side gates and rear fences
-
Patio or backyard areas
Keep each camera within 300 feet of your DVR/NVR or power source for best signal quality.
2. Measure Cable Runs
Use a measuring tape or rope to estimate total cable length. Add 10–15% extra for routing and connection slack.
3. Identify Power Source and Recording Device Location
Centralize your DVR/NVR in a dry, indoor area like a utility room or office. Plan routes that minimize visible cables.
Tools and Materials You’ll Need
Before wiring outdoor security cameras, gather your materials. This ensures a smooth installation.
| Tool/Material | Purpose |
|---|---|
| Coaxial or Ethernet cable | Transfers video and power |
| Power adapter or PoE switch | Supplies consistent power |
| Drill with masonry bits | Creates cable entry holes |
| Cable clips or conduits | Protects cables outdoors |
| Fish tape or cable puller | Helps route cables through walls |
| Weatherproof junction boxes | Shields connectors from moisture |
| Electrical tape and sealant | Prevents corrosion and water damage |
Pro Tip: Always use outdoor-rated cables. Standard indoor cables degrade quickly under UV or rain exposure.
Wiring Options: Coaxial vs Ethernet vs PoE
Different cameras use different wiring systems. Let’s compare them side by side.
| Wiring Type | Common Use | Power Method | Pros | Cons |
|---|---|---|---|---|
| Coaxial (BNC) | Analog or HD CCTV cameras | Separate power cable | Reliable for older systems | Bulkier and less flexible |
| Ethernet (Cat5e/Cat6) | IP cameras | Power over Ethernet (PoE) | Single cable for power + video | Requires PoE switch or injector |
| 2-Wire DC | Small low-voltage setups | Plug-in adapter | Simple and inexpensive | Limited range |
| Wireless (for comparison) | Wi-Fi cameras | Battery or solar | Easy install | Signal interference and range limits |
For most modern users, Ethernet with PoE is the best balance of simplicity and reliability. You only need one cable for both power and data, minimizing clutter and failure points.
If you prefer flexible or remote setups, explore Solar Wireless Security Cameras that don’t require wired power sources.
How to Wire Outdoor Security Cameras (Step-by-Step)
Step 1: Plan the Path
Mark the cable route from the camera to your DVR/NVR or router. Avoid sharp corners and high-heat areas. When possible, follow soffits or wall corners to keep wiring discreet.
Step 2: Drill Access Holes
Drill small holes through walls where cables will enter. Always angle slightly downward from inside to outside to prevent water intrusion.
Step 3: Feed the Cable
Use fish tape to guide the cable through walls or conduit. Leave extra length (about 12 inches) at both ends for adjustments.
Step 4: Connect the Camera
Attach the BNC or RJ45 connector firmly. For Ethernet, match color codes on both ends. Use a waterproof junction box to protect connectors.
Step 5: Connect to DVR/NVR
Plug the video cable into your recorder and the power cable (or PoE port) into the switch or adapter.
If using PoE, the same cable powers the camera—no extra power source needed.
Step 6: Test the Feed
Power on your system. Check each camera feed for clarity. Adjust cable slack and ensure connections are dry and sealed.
Step 7: Conceal and Secure
Use conduits, clips, or paintable covers to hide cables. Weatherproof connections with silicone sealant.

Choosing the Right Power Option
Wired cameras can be powered in several ways depending on your setup.
| Power Type | Description | Best For |
|---|---|---|
| PoE (Power over Ethernet) | Sends power and data through one Ethernet cable | IP cameras, modern systems |
| Plug-in Adapter | Each camera uses its own adapter connected to outlet | Small or home setups |
| Central Power Box | One box powers multiple cameras | Large multi-camera systems |
| Solar + Battery | Solar panels charge internal battery | Remote or off-grid areas |
If you’re unsure which fits your setup, explore options in Outdoor Security Cameras for PoE-ready models and accessories.
Protecting Cables from Weather and Tampering
Outdoor wiring must withstand harsh conditions. Follow these tips:
-
Use conduit or PVC piping: Protects from sun, rain, and rodents.
-
Seal every joint: Apply waterproof sealant at entry points.
-
Elevate where possible: Keep cables off the ground to avoid moisture.
-
Label and color-code: Simplifies maintenance or upgrades later.
-
Use GFCI outlets: Prevents shock in damp conditions.
If your home lacks attic space, you can still wire cleanly along exterior walls or soffits. Learn more about secure camera choices in Security Cameras for Home.

How to Run Security Camera Wires Without an Attic
No attic? No problem. Here’s how to wire cleanly without accessing the ceiling:
-
Use exterior conduit: Run cables along eaves or siding. Paint to match the house for a discreet finish.
-
Route through crawl spaces: If available, this keeps wires hidden and protected.
-
Drill through interior walls: For short runs, route directly to your DVR location.
-
Install outdoor cable channels: Available at most hardware stores; easy to install and waterproof.
-
Go PoE: Simplifies wiring with a single cable, especially when attics are inaccessible.
Common Mistakes to Avoid
-
Using indoor-rated cable outside (it cracks fast).
-
Running power and signal cables parallel to heavy electrical lines.
-
Leaving unsealed entry holes that allow water seepage.
-
Forgetting to label cables before connecting multiple cameras.
-
Skipping cable testing before final mounting.
Avoiding these mistakes ensures smooth video feed and fewer maintenance calls.

Which Wiring Setup Is Best for You?
Here’s a quick breakdown depending on your needs:
| Situation | Best Wiring Choice | Why It Works Best |
|---|---|---|
| New installations with modern IP cameras | Ethernet (PoE) | Single cable, easy setup |
| Older DVR systems | Coaxial + Power | Compatible with analog cameras |
| Remote or off-grid property | Solar + Wi-Fi backup | No electricity required |
| Large property or business | Central power box | Clean, organized power distribution |
For simple maintenance and remote viewing, PoE remains the most efficient and future-ready option for wiring outdoor security cameras.
Practical Tips for Safer Installation
-
Turn off power before connecting wires.
-
Use a voltage tester before touching any exposed wire.
-
Bundle cables neatly with zip ties for airflow and easier inspection.
-
Label both ends of each wire for quick troubleshooting.
-
Document your setup—take photos of wire paths and connections.
Need help understanding system capabilities? Visit What Is CCTV Security Cameras for background on how wired and networked systems differ.
Final Thoughts: Wiring Outdoor Security Cameras the Right Way
Wiring outdoor security cameras might seem technical, but with proper planning, safe materials, and clear routing, it’s achievable for most homeowners. The right wiring setup not only powers your cameras but also ensures stable video quality and long-term protection.
Choose PoE wiring for modern IP systems, use weatherproof conduits, and always test connections before sealing. With these practices, your wired outdoor cameras will stay reliable through every season.
Ready to upgrade your setup? Explore high-quality options in WiFi Security Cameras and Outdoor Security Cameras to find a model that suits your wiring plan perfectly.
Frequently Asked Questions
1. How to run wire for outdoor security camera?
Running wire starts with planning the route from your camera to your power or DVR location. Drill small angled holes to feed the cable, use fish tape to pull it through, and seal openings with waterproof caulk. Always use outdoor-rated Ethernet or coaxial cable, depending on your camera type. Secure it with conduit or cable clips to protect from weather and physical damage. Once connected, test your video feed before permanently mounting your camera.
2. How are outdoor security cameras wired?
Outdoor cameras are typically wired using Ethernet or coaxial cables. Ethernet cables (Cat5e/Cat6) can deliver both data and power using PoE, while coaxial systems need a separate power cable. Each camera connects to a DVR or NVR that records footage and provides power. Waterproof connectors and conduits protect cables from moisture. This direct connection ensures consistent video quality without relying on wireless signals.
3. How do you install wired outdoor security cameras?
Start by planning your camera placement and measuring cable lengths. Drill access holes, route the cables through conduit, and connect them to your cameras. For IP systems, plug Ethernet cables into PoE ports; for analog, connect coaxial cables to your DVR and power source. Mount the cameras securely and adjust angles for optimal coverage. Once powered, check each feed for clarity and secure cables to prevent sagging or exposure to sunlight.
4. How do I supply power to my outdoor camera?
You can supply power through PoE (using Ethernet) or a separate DC adapter. PoE setups send power and data through one cable—ideal for cleaner installations. Analog cameras usually need a separate 12V DC power adapter. Ensure all power connections are inside waterproof boxes or sealed with weather-resistant tape. For off-grid areas, solar-powered options with rechargeable batteries provide an eco-friendly alternative.
5. How do wired security cameras get power?
Wired cameras get power from a dedicated source—either through PoE switches, DC adapters, or centralized power boxes. PoE systems simplify wiring by using one Ethernet cable for both power and data, while analog cameras split video and power lines. Always confirm your voltage and amperage match the camera’s rating. Using the wrong power supply can damage hardware or cause flickering in your video feed.
6. How to run security camera wires without an attic?
If you don’t have attic access, you can still wire cameras externally. Use surface-mounted conduits or raceways along siding, under eaves, or behind gutters. Paint them to blend in. You can also drill through walls and feed cables directly to the DVR area. Where possible, use waterproof junction boxes for exterior connections. PoE wiring is ideal here since it requires only one cable per camera, simplifying tight or attic-free installations.


