

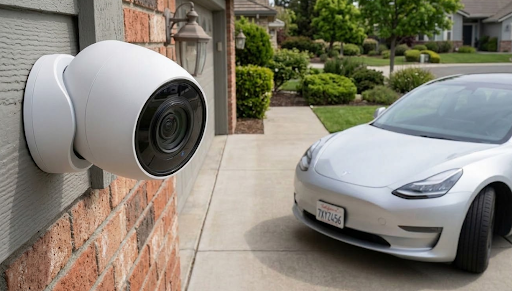
A security camera remote viewing setup lets you check live footage and recorded clips from your phone no matter where you are, using either a cellular or WiFi connected camera paired with a companion app. Getting it right comes down to choosing the right connectivity, installing the camera correctly, and linking it to an app that does not lock you into ongoing fees.
Whether you are watching over a holiday house on the coast or keeping an eye on the front gate of a rural property, remote viewing has become one of the most requested features for anyone shopping for a security camera. The good news is that it does not have to be complicated, and you do not need to pay a monthly subscription to get reliable access.
Why Remote Viewing Matters for Australian Properties
Australia's spread out geography means a lot of properties sit far from town, without reliable fixed internet, or are only occupied part of the year. A caravan park manager in regional Victoria has very different needs to someone monitoring an inner Brisbane apartment block, but both want the same thing: to open an app and see what is happening in real time.
Remote viewing also matters because it changes how quickly you can respond to something unusual. Instead of waiting until you get home to review footage, you get a push notification the moment motion is detected, and you can check the live feed straight away. For rural properties dealing with trespassers, wildlife, or theft from sheds and outbuildings, that immediacy makes a real difference.

How to Complete a Security Camera Remote Viewing Setup
Most people assume a security camera remote viewing setup requires an electrician or a technician visit, but for solar powered cameras with local storage, it is designed to be a job you can do yourself in under an hour.
Here is the general process most solar cameras follow:
- Mount the camera bracket in a position with clear sky access for the solar panel and a good view of the area you want covered.
- Insert a microSD card for local recording, so footage is stored even without an internet connection.
- Power on the camera and open the companion app on your phone.
- Scan the QR code on the camera or enter the pairing code to link the device.
- Connect the camera to WiFi, or insert a SIM card if you are using a 4G model.
- Test the live feed and adjust motion sensitivity and notification settings.
Once paired, the app becomes your remote window into the camera, whether you are two rooms away or interstate. The KeldCo app is built specifically to work with the Solar Camera Pro 2.0 4G and Solar Camera Pro 3.0 WiFi, so setup steps stay consistent no matter which model you choose.
Choosing Between 4G and WiFi for Your Setup
The connectivity option you pick has the biggest impact on how well your camera performs day to day. This is where a lot of first time buyers get stuck, because the right answer depends entirely on what is already available at the property.
| Feature | Solar Camera Pro 2.0 4G | Solar Camera Pro 3.0 WiFi |
|---|---|---|
| Best for | Remote or off grid locations | Properties with existing WiFi |
| Connection type | Cellular (SIM required) | Home or business WiFi network |
| Ongoing cost | SIM data plan only | No data plan needed |
| Ideal use case | Farms, sheds, holiday homes without internet | Suburban homes, units, offices |
If your property already has a stable WiFi connection reaching the camera location, the Solar Camera Pro 3.0 WiFi is generally the simpler and cheaper option, since there is no ongoing SIM cost to manage. If you are covering a paddock gate, a bush block, or anywhere signal strength for WiFi drops off, the Solar Camera Pro 2.0 4G is the better fit, because it relies on the mobile network rather than your home router.
For anyone weighing these two paths, we would recommend starting with a quick signal check at the exact spot you plan to mount the camera. WiFi strength can drop dramatically just a few metres from the router, especially outdoors or through brick walls, so testing before you commit saves a lot of frustration later.
Setting Up the App for Remote Access
Once the camera itself is connected, the app is where the actual remote viewing happens. This is also the step where subscription based systems tend to trip people up, since many brands require a paid plan just to view footage older than a few hours.

With a local storage system, footage stays on the microSD card inside the camera, so you can scroll back through recordings without paying anything extra. Live viewing works over your mobile data or WiFi wherever you are, and most apps let you set custom detection zones so you are not getting notifications every time a bird flies past.
A few practical tips that make a real difference once your security camera remote viewing setup is live:
- Turn on push notifications but limit them to your main entry points, otherwise the alerts become background noise you start ignoring.
- Label each camera clearly in the app (front gate, shed, side path) so you are not guessing which feed is which during a real alert.
- Check battery and solar charge levels weekly for the first month to confirm the panel is getting enough sun exposure at that angle.
Common Remote Viewing Issues and Quick Fixes
Even a well planned setup can run into small hiccups, and most of them are easy to resolve once you know what to look for.
| Issue | Likely Cause | Fix |
|---|---|---|
| Live feed won't load | Weak WiFi or mobile signal | Reposition camera or check SIM data balance |
| Delayed notifications | Background app restrictions | Allow app background activity in phone settings |
| Camera shows offline | Panel not getting enough sun | Adjust panel angle or clean surface dust |
| Recordings missing | SD card full or not formatted | Format card in app and set overwrite settings |
Most issues trace back to connectivity or power, rather than the camera hardware itself, which is why choosing the right model for your location matters so much upfront.
For anyone comparing wireless options more broadly, our guide on a wireless outdoor security camera without subscription walks through how local storage models stack up against cloud based competitors. If you are still deciding between connection types, our breakdown of a security camera that connects to phone without wifi covers the 4G side of things in more detail.
Things to Know About Security Camera Remote Viewing Setup
Before you buy or install anything, there are a handful of details worth keeping in mind for the Australian context specifically.
- Solar panels need reasonably direct sun for at least four to six hours a day to keep the battery topped up, so shaded courtyards or south facing walls are not ideal.
- 4G models depend on mobile network coverage, so it is worth checking Telstra, Optus, or your provider's coverage map for the exact property before purchasing a SIM based camera.
- Local recording avoids the privacy and ongoing cost concerns tied to cloud storage, since footage never leaves the physical SD card unless you choose to save it elsewhere.
- Australian privacy law generally allows cameras to record footage on your own property, but pointing a camera into a neighbour's yard or a shared space can raise legal issues, so aim the lens carefully during installation.
- Extreme heat in summer can affect battery performance, so mounting the camera with some shade cover, while still keeping the solar panel exposed, helps it run more reliably year round.
If you want to see the full range of local storage options available, our DIY security system collection and self monitoring security system collection both feature subscription free models built for exactly this kind of setup.
Wrapping Up
A reliable security camera remote viewing setup really comes down to three things: picking the right connectivity for your property, mounting the camera where it gets consistent sun and signal, and pairing it with an app that does not charge you just to check your own footage. Once those pieces are in place, checking on your property from anywhere becomes second nature.
If you are still narrowing down which model suits your situation, browsing the LTE security camera collection is a good next step for anyone leaning toward mobile connectivity, and our guide on how to connect a security camera to your phone covers the pairing process step by step for extra peace of mind.

Frequently Asked Questions
How do I view my security cameras remotely?
Open the companion app on your phone and select the camera's live feed. Once the camera is paired with the app over WiFi or 4G, you can view live video and stored recordings from anywhere with a data connection, without needing to be on the same network as the camera.
How much does a wireless security camera system with remote viewing cost?
KeldCo's solar cameras start from a one off hardware cost with no ongoing subscription fees. WiFi models avoid data costs entirely, while 4G models only require a basic SIM data plan, making the overall cost far lower than cloud subscription based systems over time.
How to activate remote viewing?
Remote viewing activates automatically once the camera is paired with the app. After scanning the QR code or entering the pairing code during setup, live viewing and notifications are switched on by default, so there is no separate activation step needed.
How to set up a wireless security camera system with remote viewing?
Mount the camera, insert an SD card, then pair it with the app over WiFi or 4G. From there, adjust motion detection zones and notification preferences so the remote viewing experience matches how you actually want to monitor the property.
What is the best app for viewing remote cameras?
The KeldCo app is the best option for KeldCo's solar camera range. It is built specifically for the Solar Camera Pro 2.0 4G and Solar Camera Pro 3.0 WiFi, offering local storage access, custom detection zones, and subscription free remote viewing in one place.
